User Guide
User Guide
If you connect the Bot to your server early on, you can automate some steps below!
Additional Server Set Up Steps (~15 minutes)
Add a little bit of polish to the user experience by adding a welcome screen, rules template, and enabling the Community Server option.
Fill in the Rules Channel
You can write your own rules, or you might like to use the following template as a guide.
The text above can paste directly into Discord, and the emoji should appear. You may like to adjust these rules:
- You might not like the nickname format in (1), or care about the students using their names.
- Rule (4) is for programming units, adjust as needed.
- You should set your own ground rules for how students contact you via discord in rule (8).
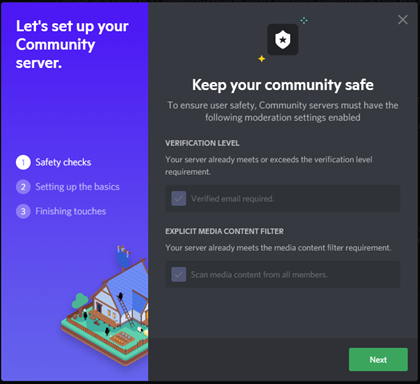
Enable Community Server
Turning your server into a Community Server allows you to have a welcome screen, and a more advanced rules channel.
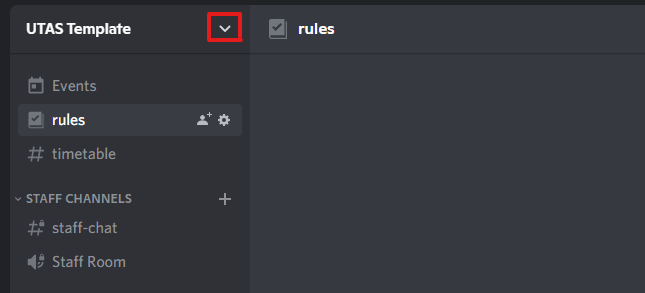
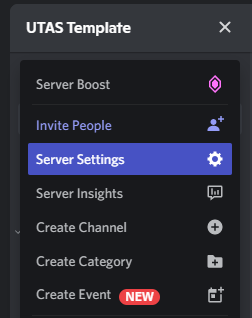
This setting, like the other options in this section can be found under the Server Settings page, accessible from the top-left corner.
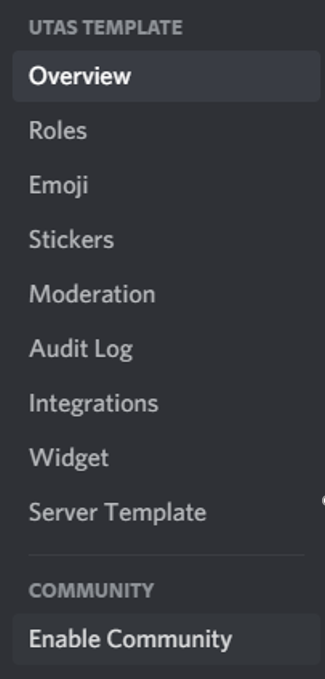
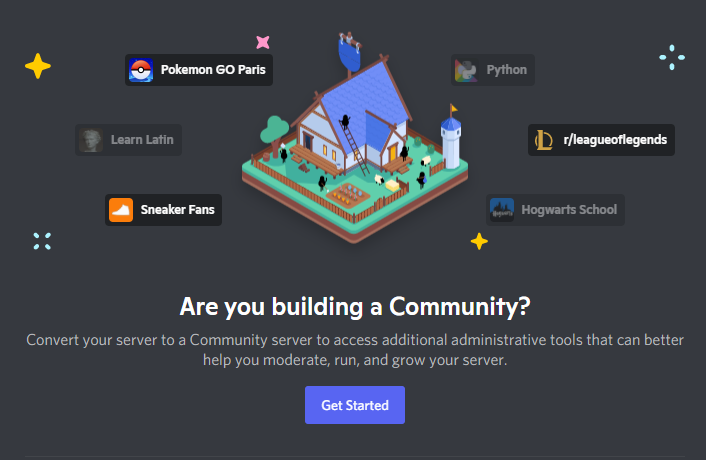
On the Server Settings page, choose Enable Community on the left-hand side. Then click Get Started
Follow the steps in the wizard. You need to enable all options to continue. You'll need to select the #rules channel from the dropdown list.

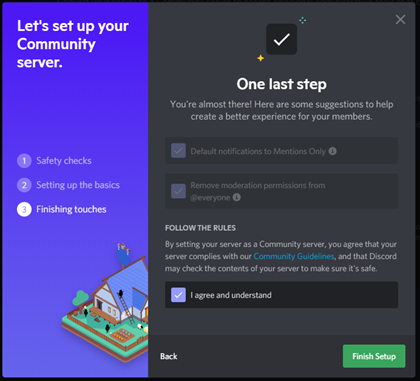
Once this is complete, it is recommended to add a short description on the Community Server settings page. This will appear on the Welcome Screen (see below).
Set Up a Welcome Screen
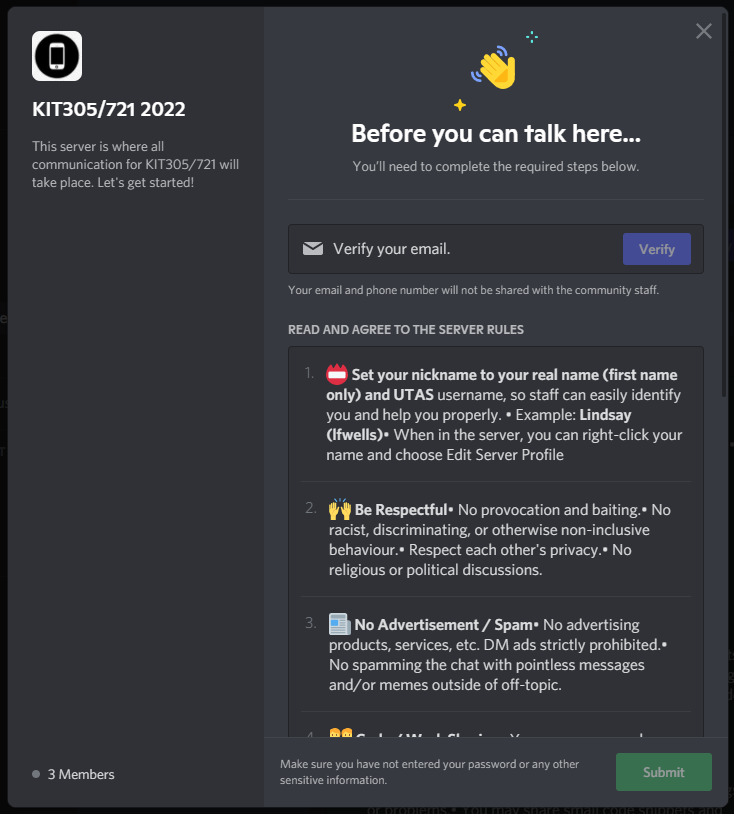
When students first join your server, you can show them a welcome screen like the one below:
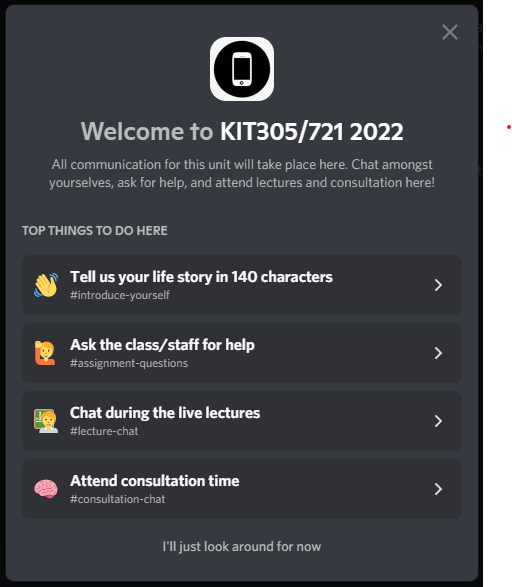
On the Server Settings page, choose Welcome Screen on the left-hand side. Then click Set Up Membership Screening. Then click Get Started.
You will be prompted to add a recommended channel for people to visit, along with a description. See the picture above for examples. Make it pretty, by clicking the emoji icon.
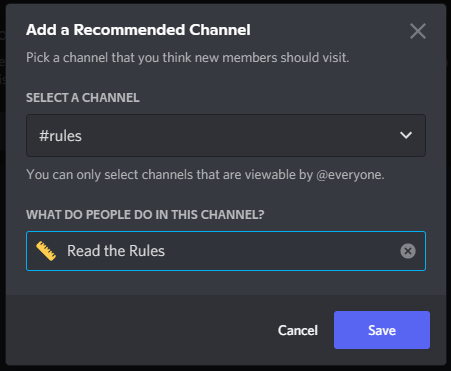
Once you are done, be sure to click Enable on the Welcome Screen settings page.
Set Up a Membership Screening (Rules Popup)
After the welcome screen, you can prevent students from posting until they have accepted the server rules:

On the Server Settings page, choose Membership Screening on the left-hand side. Then click Set Up Welcome Screen.
You will be prompted to enter in each individual rule. You may want to copy and paste from the rules post you set up earlier.
Currently, screening is just acceptance of the rules, but in the future Discord will add additional features to the screening page.
Once you are done, be sure to click Enable on the Membership Screening settings page.
Create a Campus and Pronouns Selector
Students can be given roles to categorise them. You can send notifications to groups of students using this method (e.g. by tagging @Launceston role). You can also see roles on a student's profile (e.g. maybe you can see that they have chosen their preferred pronouns, so you can communicate better with them). You can even give people with specific roles access to special channels.
You and other adminstrators can assign roles by right-clicking a student's name, however sometimes you may want students to select their own roles. This can be done using the /role_select_message command:
/role_select_message Command
(ADMIN ONLY) Provides users with buttons to self-assign themselves to roles (e.g. Select Campus)
message | The prompt to show users above the role select buttons. - (required) |
|---|---|
role_1 | Name of the first role button to appear (role will be automatically created if not found). - (required) |
role_2 | Name of second role button to appear (role will be automatically created if not found). |
role_3 | Name of third role button to appear (role will be automatically created if not found). |
role_4 | Name of fourth role button to appear (role will be automatically created if not found). |
role_5 | Name of fifth role button to appear (role will be automatically created if not found). |
response_message | Custom response to show a user after they click a button. Will only appear for that user. |
limit_to_one | Prevent users from selecting more than one option (if they do, roles are switched). Default: TRUE |
Here are some examples of how you can use this command -- I like to post them in the #rules channel for visibility, as this is the first channel students see.
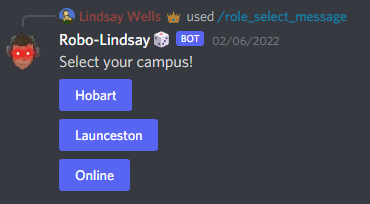
/role_select_message message: Select your campus! role_1: Hobart role_2: Launceston role_3: Online response_message: Thanks, and welcome! Now, make sure your server nickname is set correctly (**FirstName (username)**), then why not introduce yourself?
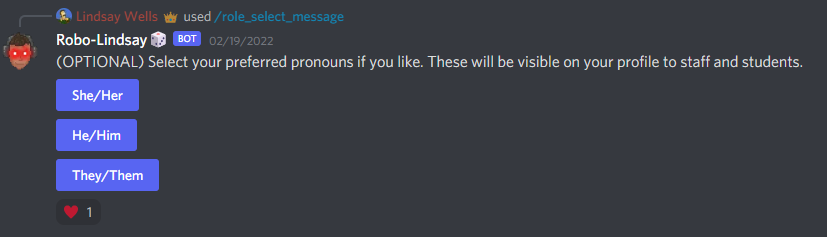
/role_select_message message: (OPTIONAL) Select your preferred pronouns if you like. These will be visible on your profile to staff and students. role_1: She/Her role_2: He/Him role_3: They/Them response_message: Thanks! Doing this helps make the server more inclusive, and helps me communicate with everyone better ❤️🔥 limit_to_one: false
For more information on roles, see Role Management 101 (Discord Support Article).
Additional Channel Ideas
The given template has most of the channels you might need, but here are some suggestions for channels you could add:
- #suggestions -- Allow students to provide feedback on the unit/Discord
- #reminders -- Remind students about specific deadlines etc (e.g. tag people who haven't completed the weekly quiz etc.)
You might like to have channels which students can see but cannot post in. The best approach to this is to create an Announcement channel in the Create Channel popup. You can have as many announcement channels as you like, and can name them whatever you like.